Spline creation in Photoshop:
Once the splines were drawn, using the same process as the face the lines were created and turned into polygons and welded to together to create one whole object. Now the ear could be shaped into a 3D model as it is currently a 2D flat plane.
Using the reference planes and positioning the ear in the correct plane the ear can now be pulled out like the face with the move tool on the vertex points. It was difficult to shape the ear as it has so many dips and edges to model.
Sectors of the ear required the use if the ‘inset’ tool. By selecting the polygons in the areas where the ear had depth, areas like the centre of the upper ear, the ‘inset’ tool could be used to create a drop in the surface.
Below is an example:
Selecting the polygons
Creating an insert using the ‘inset’ tool
Once the inserts had been modified so that they were positioned correctly within the ear, the ear could now be shaped and finalised. This process was made easier by putting the ear into isolation mode enable me to fully work only on the ear.
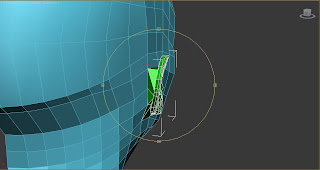
Now it was time to create the back. It was important to take note on how many polygons I had on the side of the head to be able to attach the ear to. With a combination of the create tool, the edge tool and the snap tool to generate more polygons I managed to reduce the number of polygons to a total of three on the rear of the ear.
This would make the attachment process a lot easier. The rear of the ear didn’t require any precise modelling as it would not be seen once it was attached to the side of the head.
To attach the ear to the head it requires both the head and the ear to be in ‘see through’ mode. This allowed me to see both the vertex points on the ear and on the head. This was a time consuming process as aligning the vertex points with the right ones on the head wasn’t easy.
Using the snap tool and ensuring it was in the vertex mode, I attached the ear to the head. Once all of the vertex points on the ear were attached to the correct ones on the head it was now time to finalise the attachment by selecting all the vertex points and using the ‘attach’ tool in the edit poly modifier. This would enable the vertex points to be now welded together.
Ensuring the correct settings on the snap tool:
Stiching the ear to the head:
The results:


No comments:
Post a Comment